How to Replace Sofa Feet Easily
Replacing sofa feet is a small repair, but the right method protects the frame and keeps the sofa steady. Before you begin, turn the sofa carefully onto a padded surface and check how each foot attaches. Some feet screw into threaded inserts; others use mounting plates or bolts. A quick look beneath the frame can prevent a wrong-size purchase. Measure the existing fittings, note the foot height, and photograph the attachment points. Small details matter.
A practical reminder from “Sofa Feet specialist Alex Morgan” is: “Match the fitting before you match the finish.” This is an illustrative expert-style quotation, not a verified statement from a real, sourced specialist. With the correct replacement parts, the job usually needs only basic tools and a few careful turns. Keep the sofa supported while working, and do not force a foot that resists. Threads can strip. If a fitting is damaged or the frame feels loose, pause and assess it before adding weight. This guide explains how to remove old Sofa Feet, choose compatible replacements, and attach them securely. It also covers common snags, such as uneven floors and mismatched thread sizes. One caveat: older sofas may use unusual fittings, so a replacement that looks right may still not fit. Verify before you install.
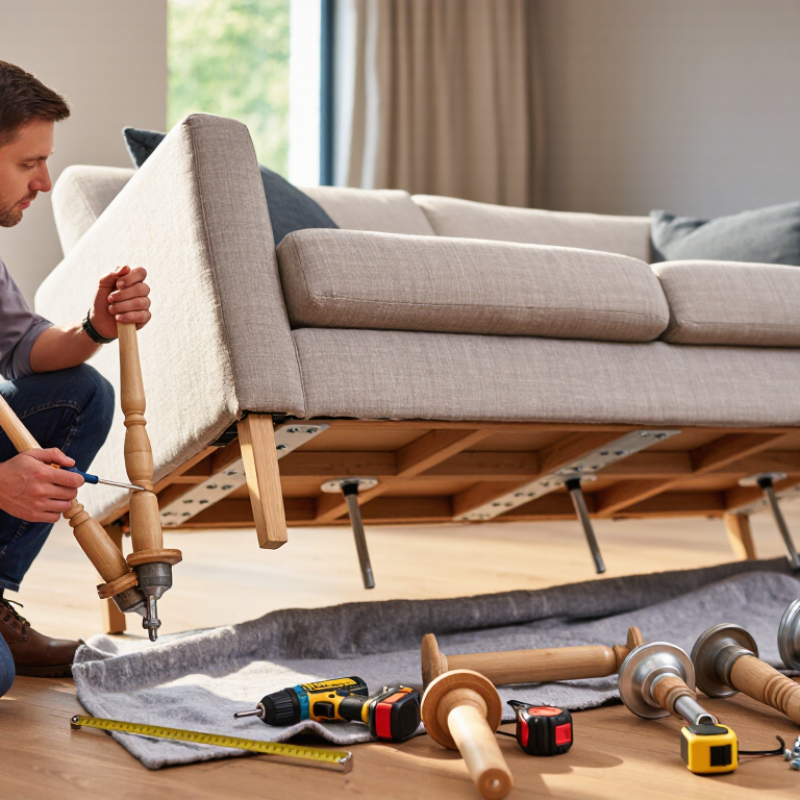
Identify the Sofa Feet and Choose Compatible Replacements
Before replacing sofa feet, identify how each one attaches. Look beneath the frame for a threaded stem, a flat mounting plate, or screws entering the wood. Count the feet, including any center support. Measure the stem diameter and thread pitch, or record the plate’s width and hole spacing. A ruler helps, but a thread gauge is more reliable. Similar-looking fittings can differ by a fraction of a millimeter.
Check the original foot’s height, angle, and material, then compare them with the sofa’s frame and floor. The replacement should sit flat, keep the sofa level, and use the same attachment type. Avoid forcing a screw that resists; it may damage the frame. I still double-check thread size, because a quick visual match can be misleading. Small details matter. For uneven floors, adjustable feet may help, but they must support the frame securely. Keep the sofa’s center supports in place.
Repair can also reduce waste. The U.S. EPA’s Advancing Sustainable Materials Management: 2018 Fact Sheet reported that furniture and furnishings generated 12.1 million tons of municipal solid waste in the United States. That figure does not measure sofa-foot repairs specifically, but it gives useful context for maintaining usable furniture. Before buying, compare all feet together, not just one. A mismatched height can make the sofa rock and place extra stress on its joints.
Gather the Tools Needed for the Replacement
Before replacing sofa feet, gather a socket wrench or adjustable wrench, a screwdriver, a tape measure, and a small tray for screws. Check the new feet’s thread size and mounting style against the old ones; a close visual match is not enough. Keep a soft blanket nearby to protect the upholstery, and take a photo of each bracket before removing it. That small step can save guesswork later.
Tips: NIOSH’s Revised Lifting Equation Applications Manual sets a 51-pound recommended limit only under ideal lifting conditions. A sofa is awkward to grip, so its real handling risk may be higher. Ask someone to help tilt it, and support the frame rather than pulling on an arm or cushion. Keep tools within reach. Keep it simple.
Work on a level floor and raise one side at a time, using a stable support that cannot slide. Remove each foot slowly; if a screw resists, stop and check for another fastener instead of forcing it. Compare the replacement’s height and base width with the original, then tighten it snugly without overtightening. I would recheck every foot after lowering the sofa. It is easy to miss one loose fitting when the job feels nearly done.
Remove the Existing Sofa Feet Safely
Before removing the existing sofa feet, clear the area and take cushions off the sofa. Ask someone to help; many sofas are heavier and more awkward than they look. Lay a thick blanket beside the sofa to protect the floor and upholstery. Lift and tilt the frame slowly onto its side, supporting it on padded blocks if needed. Don’t let the weight rest on an arm, a loose cushion, or a delicate trim piece. If the sofa has a powered recliner, unplug it before moving the frame, and keep cords clear.
Look closely at each foot and its connection. Some feet unscrew by hand, while others use bolts or screws hidden beneath fabric or a small cover. Take a photo of the fittings before removal; it can help you match the new feet later. Use a correctly sized wrench or screwdriver, and turn gently. Keep the hardware together in a small container. If a foot resists, stop and check for another fastener instead of forcing it. That small pause matters.
Remove one foot at a time, keeping the sofa stable throughout. Watch for washers or spacers, and note where they belong. Old fittings can be stubborn, and I’ve found that rushing usually makes the job harder. If the frame shifts, a fastener spins without loosening, or the attachment looks cracked, lower the sofa carefully and reassess before continuing.
Attach the New Feet to the Sofa
With the new feet beside the sofa, check that each one matches the original attachment: screw-in stems, mounting plates, and bolt spacing are not interchangeable. Tip the sofa onto a padded surface, not directly onto a hard floor. Remove old feet and loose hardware, then inspect the frame for cracks or stripped holes. If the frame feels soft or damaged, pause; a longer screw is not a reliable fix.
Attach each foot by hand first, turning it straight to avoid cross-threading. For plate-mounted feet, align the plate with existing holes and tighten the screws evenly. Use the specified fasteners, and stop when snug; forcing a screw can split wood. Set the sofa upright with help, then press gently on each corner. It should sit level without rocking. A small wobble may mean one foot is misaligned, though uneven flooring can also be the cause. Recheck after a day of normal use.
Tips: Keep the sofa unloaded while fitting the feet. EPA’s 2018 materials report counted 12.1 million tons of discarded furniture and furnishings in the United States. Repairing a sound frame can help keep usable furniture in service, but don’t compromise stability to avoid replacement.
Check the Sofa for Stability and Levelness
After replacing the sofa feet, check stability before anyone sits down. Place the sofa on a firm, level floor and remove cushions or loose items that might shift. Press gently on each corner, one at a time. The feet should stay in contact with the floor, without rocking, clicking, or sliding. Check that each fastener feels secure, but do not force a screw that resists turning. A stripped hole can make the leg less stable.
Tips: Use a spirit level across a firm seat rail, not a soft cushion. If the sofa rocks, place a thin card beneath the low foot to identify the gap. Then inspect that foot’s fit and attachment. Do not treat the card as a permanent repair.
A sofa can feel level and still move when weight shifts, so test it carefully from several sides. Sit down slowly, then stand and check the feet again. On carpet, press the pile flat around each foot before judging the result. If a leg keeps loosening or the frame feels cracked, stop using the sofa until the attachment is inspected. I have found that a second check after a day of ordinary use can catch movement missed during the first test. It is easy to overlook.